The Performance Cliff Below $100
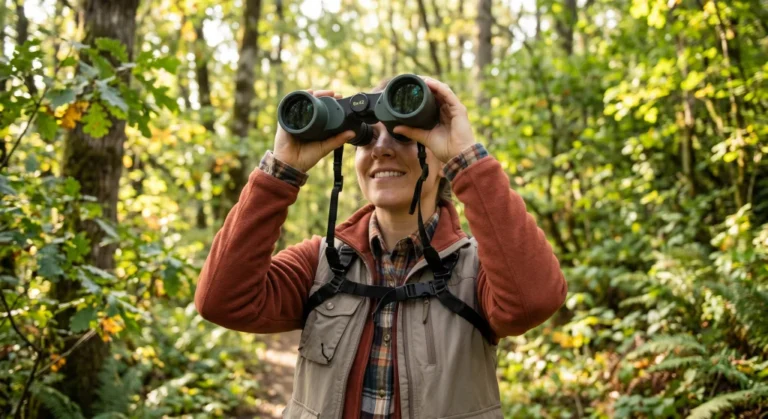
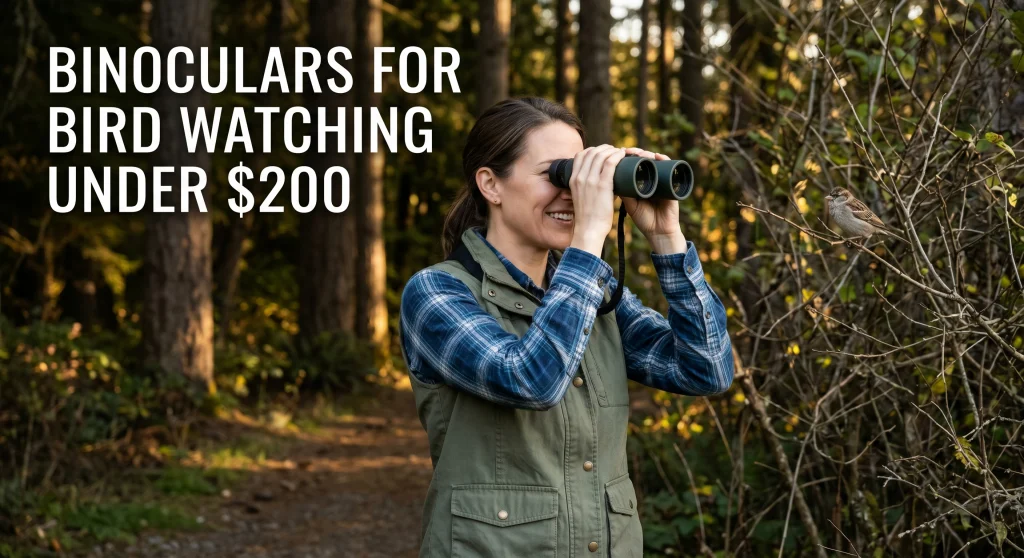
If you are looking for binoculars for bird watching under 200, the single most important thing you can do is understand exactly where the optical line is drawn. I’ve watched countless people at the optics counter try to save an extra fifty bucks, only to end up with an instrument that makes finding a warbler in a dense tree nearly impossible.
The most common mistake I see new birders make is buying a $60 blister-pack binocular, assuming that magnification is all that matters. I always had to gently explain that below $100, optical components are fundamentally limited by raw manufacturing costs. You are hitting a point where the math simply does not support good glass, durable housing, and precise mechanical alignment.
In this bottom tier, you will almost always encounter single-coated lenses and uncoated prisms. In practical terms, this means the optics do not gather enough light for you to identify a thrush in the dark understory of a forest. The image often looks washed out, heavily tinted, or cloudy around the edges. The focus wheel usually feels either too stiff to move quickly or loosely disconnected from the internal mechanics.
Field Note: One of the most frequent complaints I heard at the counter was from frustrated customers bringing in a $75 pair they bought for a birding trip. They complained that they couldn’t find the bird their guide was pointing at. They could see it with the naked eye, but the moment they brought the binoculars up, the narrow field of view and dim image made the bird vanish. That is the daily reality of the sub-$100 cliff.
Furthermore, the close focus distance on these ultra-budget models is often a complete dealbreaker for birders. Cheap birding binoculars frequently have a minimum focus distance of 15 to 25 feet. If a chickadee lands on a branch ten feet in front of you, you won’t be able to focus on it. For backyard watching or dense forest trails, that limitation is incredibly frustrating.

High-density optics with XR anti-reflective coatings deliver exceptional edge-to-edge clarity and bright views across a wide 409 foot field of view, even in low light. Argon-purged and O-ring sealed for lifetime waterproof and fog-proof performance, with Armortek scratch-resistant exterior coating. A locking diopter, smooth center focus wheel, twist-up eyecups, and an included GlassPak chest harness round out this full-featured hunting binocular.
Check On AmazonIf you click this link and buy, we earn a commission at no additional cost to you.
Where the Real Floor Is: $130 to $200
The good news is that you don’t have to spend a fortune to get past those limitations. Between $130 and $200, you hit the real optical floor. This is where budget binoculars for birding transition from frustrating toys to highly functional field tools. The jump in quality from $80 to $180 is — from what I’ve seen — the most dramatic leap you can make in the entire optics world.
In this specific price window, manufacturers start including BAK-4 prisms instead of the cheaper BK-7 glass. This immediately improves the brightness and edge-to-edge clarity of your image, eliminating the squared-off, shadowed edges common in cheaper models. You will also start seeing fully multi-coated (FMC) lenses. This means every single glass-to-air surface has multiple anti-reflective coatings applied, drastically increasing the amount of light that actually reaches your eye.
Key point: The Audubon Society proved this exact baseline with rigorous empirical testing. During a recent convention, they had dozens of experienced birders field-test nearly fifty different binocular models over three days. Instead of relying on marketing specs, they tested for actual field performance like tracking speed and edge clarity. When the results were tallied, they found that consistent, genuinely usable optical quality for serious birding reliably started right in the $150 to $200 category.
More importantly for practical field use, this is the price point where close focus finally becomes an asset rather than a liability. You can consistently find models in this bracket that focus down to 8 or even 6 feet. This transforms how you watch birds, allowing you to study subtle feather details on a sparrow at your backyard feeder rather than just observing vague shapes in the distance.
Navigating the Bracket and the Refurbished Option
Even within this strict budget, there are tiers. Around $130 to $150, you get the fundamental optical upgrades (BAK-4 and FMC) but typically in a slightly heavier or bulkier housing. As you push toward $175 and $200, you start seeing smoother focus wheels, slightly wider fields of view, and better eyecup mechanics.
If you are capped at $200, another highly effective route is looking for factory-refurbished mid-tier binoculars. Buying a refurbished $300 binocular for $190 often gets you slightly better glass and comparable optical performance compared to buying a brand-new $190 entry-level model, provided you check the warranty terms carefully, as many brands shorten coverage on refurbished units.
If you are still trying to figure out which specifications matter most for different outdoor activities, our full binoculars buying guide maps out exactly how to match your glass to your specific use case, ensuring you aren’t paying for features you will never use.

Fully multi-coated lenses and phase-coated BaK-4 prisms deliver bright, crisp, color-accurate images across all lighting conditions, with a wide 7.4 degree field of view for easy tracking. The rubber-armored polycarbonate body is waterproof, nitrogen-purged, and tripod-adaptable for extended sessions. Backed by a Celestron Limited Lifetime Warranty and US-based support.
Check On AmazonIf you click this link and buy, we earn a commission at no additional cost to you.
What You Sacrifice When You Don’t Spend $300 to $400
When I handed a customer a $180 binocular and a $350 binocular to look at a brick wall across the parking lot in broad daylight, they usually couldn’t tell the difference. And that is exactly why so many people wonder why anyone ever spends more. In full, bright sunlight, the differences between these two price tiers are remarkably marginal.
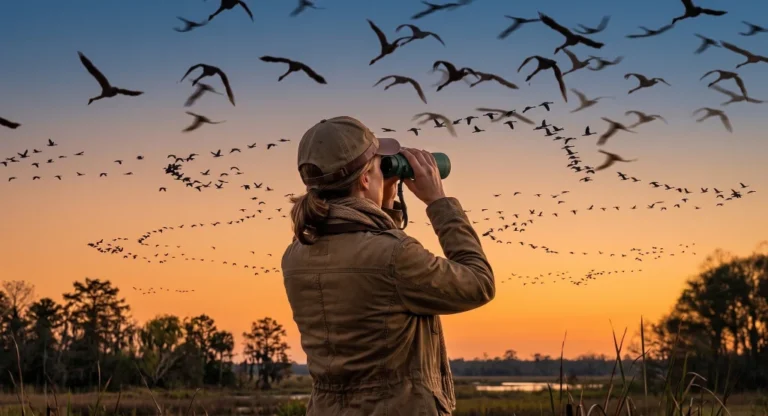
The sacrifice happens at the edges of performance. The most visible gap is low-light capabilities. When you are looking for an owl at dusk, or trying to pick out a warbler in heavy timber right after sunrise, that $350 pair will pull color and sharp detail out of the shadows. The sub-$200 pair will start to render everything in flat, muddy grays. That difference in glass quality at the margins is exactly what you are giving up.
Here are the specific optical trade-offs you make in the under $200 tier:
- Color fringing (chromatic aberration): You will likely see a faint purple or yellow halo around dark objects set against a bright background, like a hawk perched on a high branch against a gray sky. Budget glass struggles to correct this completely.
- Edge sharpness: While the dead center of your image will be pleasantly sharp, the outer 20 percent of the field of view will likely soften or blur.
- Field of view width: Budget manufacturing constraints often mean using slightly narrower eyepieces. This restricts how wide your viewing angle is, making it a bit harder to track fast-moving birds through the canopy.
- Focus wheel precision: The mechanical feel of the focus wheel might have slight dead spots or lack the buttery, immediate resistance of mid-tier and premium glass.
If you eventually find yourself with the budget to step up, or if you just want to see the broader landscape of what is available, our main guide covering binoculars for bird watching breaks down what you gain at every major optical tier.
The Durability and Weatherproofing Reality
Beyond the glass itself, the other major compromise in this price bracket is the physical build. Most binoculars sold between $130 and $200 claim to be fully waterproof and fog-proof, and they usually are—straight out of the box. They are O-ring-sealed and nitrogen-purged. However, the long-term reliability of those seals is where the budget origins show themselves over time.
In my time handling returns, repairs, and warranties, I noticed a very clear pattern. If a birder used a $150 binocular heavily—tossing it in the truck, hiking in pouring rain, and exposing it to wild temperature swings—the seals would eventually begin to fail after two or three years. Internal fogging would slowly creep in. The external rubber armoring might start to peel at the edges or lose its grip.
Expecting a $150 binocular to survive being dropped on rocks, submerged in creeks, and left in hot car dashboards for ten years without failing.
Treating your budget binoculars reasonably well and accepting that heavy, daily fieldwork will likely require an upgrade or replacement within a few years.
If you are an occasional weekend birder, or mostly watch from the comfort of your back deck, binoculars for bird watching under 200 dollars will easily last you a decade. But if you are out in the field four days a week in highly varied weather, you should view a binocular in this price range as an entry-level investment. You are buying excellent starter optical performance, but you are not buying lifetime mechanical durability.

ED prime glass with full multi-coating delivers maximum brightness and clarity, while dielectric prism and ultra wide-band coatings ensure precision color accuracy across all lighting conditions. The Exo barrier lens coating actively repels water, oil, debris, and fog for effortless maintenance in the field. A lightweight yet rugged magnesium chassis keeps the build fully waterproof without adding unnecessary weight.
Check On AmazonIf you click this link and buy, we earn a commission at no additional cost to you.
The Non-Negotiable Specs to Check Before Buying
When you are shopping at this specific price floor, you have to read the spec sheet very carefully. Manufacturers often mix and match features to keep their production costs down, so you cannot assume a binocular has everything you need just because it hits the $180 mark.
| Spec to Check | What You Need | The Budget Trap to Avoid |
|---|---|---|
| Close Focus | Under 8 feet | Settling for 12-15 feet, which completely ruins backyard birding. |
| Prism Glass | BAK-4 | BK-7 prisms, which result in dimmer, squared-off exit pupils. |
| Coatings | Fully Multi-Coated (FMC) | “Multi-Coated” or “Fully Coated” (meaning only some surfaces have single coats). |
| Eye Relief | 15mm or more | Buying 12mm eye relief and finding them entirely unusable with your glasses. |
Additionally, stick to an 8×42 configuration. High magnification (like 10x or 12x) magnifies the flaws in cheap glass just as much as it magnifies the bird. An 8×42 is far more forgiving, provides a wider field of view, and is much easier to hold steady.

Multilayer-coated lenses with silver-alloy prism coating deliver vivid, sharp images from dawn to dusk. O-ring sealed and nitrogen-purged, they stay clear through rain, snow, and humidity. The fiberglass-reinforced polycarbonate body with rubber armor keeps them lightweight yet durable, with turn-and-slide eyecups for comfortable all-day use with or without glasses.
Check On AmazonIf you click this link and buy, we earn a commission at no additional cost to you.
Final Thoughts: Setting Your Expectations
Shopping for optics on a strict budget requires actively managing your expectations. The goal here isn’t to find a hidden gem that performs exactly like a thousand-dollar alpha binocular. From everything I’ve seen, that simply doesn’t exist. The actual goal is to cross the threshold where the instrument stops holding you back from identifying birds.
If you spend between $130 and $200, stick strictly to an 8×42 configuration, and verify that it has fully multi-coated lenses and a close focus under eight feet, you will walk away with a highly capable birding tool. It will show you true plumage colors and gather enough light for early morning walks. For most beginners and casual birders, that is exactly where the optical journey should start. If you are ready to see what these numbers look like in practice, check out the specific recommendations below that hit this exact performance sweet spot.
FAQs
🦅 Are cheap birding binoculars worth buying?
Binoculars under $100 are almost never worth buying for serious birding due to poor glass coatings and narrow fields of view. However, binoculars in the $130 to $200 range represent a massive leap in quality and are excellent starting points for most birders.
👓 Can I get good eye relief for under 200 dollars?
Yes, many models in the $150 to $200 tier offer 15mm or more of eye relief. If you wear glasses, always check the spec sheet and avoid anything with 14mm or less, regardless of the price.
🌧️ Are budget binoculars actually waterproof?
Most binoculars over $130 are O-ring-sealed and nitrogen-purged, making them waterproof out of the box. However, the rubber seals on budget models tend to degrade faster than on premium models under heavy, daily field use.
🦉 Will a 200 dollar binocular work for dusk birding?
An 8×42 binocular under $200 will be highly functional at dusk, but this is exactly where premium glass pulls ahead. You will lose some color contrast and edge detail in low light compared to a $400 or $800 pair.
📏 What magnification is best for cheap birding binoculars?
Always stick to 8x magnification when buying on a budget. Higher magnifications like 10x or 12x amplify the optical flaws of cheaper glass, create a dimmer image, and narrow your field of view.