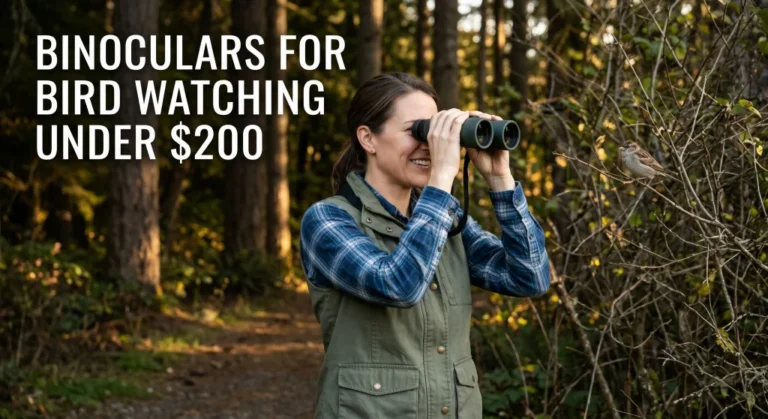
The Spec That Overrides Everything Else
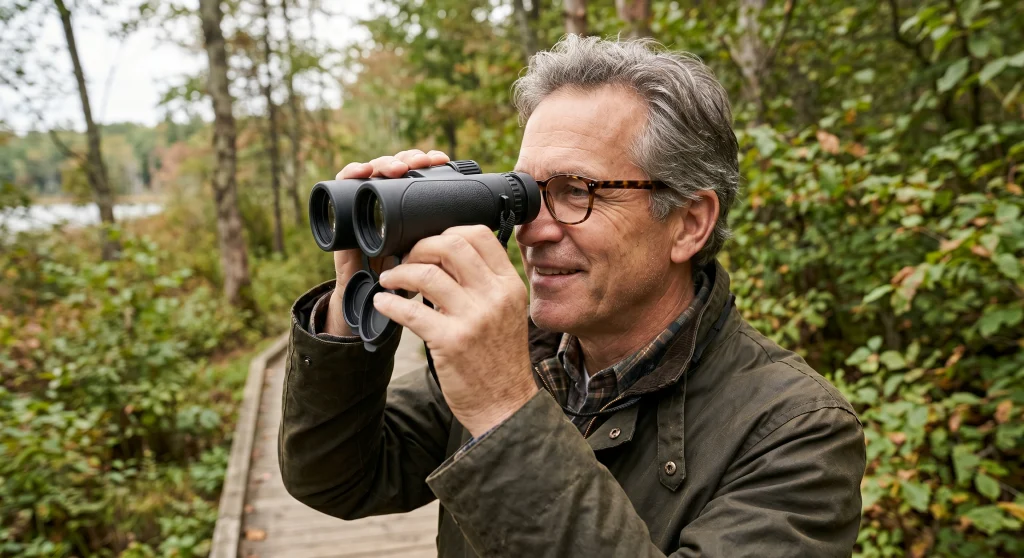
I have watched this confusion play out more times than I can count at the optics counter. People come in looking for the best binoculars for bird watching with glasses, but they start by comparing magnification and glass coatings. They often skip right past the one number that dictates whether they can actually use the instrument. Eye relief is the specification that overrides every other consideration. You can buy the brightest glass on the market, but if the eye relief is too short, you will not see the whole image. The most common mistake I see is a birder choosing a model based on a friend’s recommendation, only to realize that friend does not wear spectacles.
In my experience, the frustration usually sets in during the first field outing. You spot a warbler moving quickly through the canopy, you bring the optics up, and instead of a wide, immersive view, you see a tiny circle of light surrounded by black borders. You find yourself pushing the eyepieces hard against your lenses, trying to get closer to the glass. This is what happens when you prioritize brand reputation over physical fit. The distance between your eye and the ocular lens is a fixed optical requirement. If your frames prevent you from reaching that sweet spot, you lose a massive percentage of your field of view.
What Minimum Eye Relief Actually Looks Like in the Field
When you look at a spec sheet, you will usually see a number measured in millimeters. The technical floor for anyone wearing spectacles is 14mm. Anything less than this is going to cause immediate problems, forcing you to smash the eyecups into your frames just to see the center of the image. However, a technical minimum is rarely a comfortable baseline. For regular birding use, I always point people toward a minimum of 15mm. That extra millimeter provides a crucial buffer, allowing you to rest the instrument gently against your frames rather than pushing them aggressively into your face.
The shape of your face and the style of your frames play a massive role here. If you wear thick acetate frames that sit far off your face, that 15mm might still feel restrictive. If you have thin wire frames that sit very close to your eyes, you might get away with 14.5mm. This is why testing in person is incredibly valuable. You need to know exactly how much physical gap exists between your pupil and the back of your eyeglass lens.
Field Note: One of the most common things I heard at the counter was customers returning high-end 8×32 models. The glass was flawless, but the eye relief sat at exactly 14mm. After three hours of birding, their noses hurt from the frames being pushed down, and their lenses had noticeable grease smudges from the rubber eyecups.
| Spectacle Type | Recommended Minimum Eye Relief | Real-World Experience |
|---|---|---|
| Thin wire frames (close fit) | 15mm | Allows for a gentle rest against the frame with a full, unclipped view. |
| Thick acetate or plastic frames | 16mm to 17mm | Compensates for the extra bridge thickness pushing the frame further out. |
| Progressive lenses | 17mm to 20mm | Accounts for the specific head tilt and varying focal zones required. |
| Deep curve sport sunglasses | 18mm+ | Required to clear the aggressive wrap-around profile without touching the glass. |

High-density optics with XR anti-reflective coatings deliver exceptional edge-to-edge clarity and bright views across a wide 409 foot field of view, even in low light. Argon-purged and O-ring sealed for lifetime waterproof and fog-proof performance, with Armortek scratch-resistant exterior coating. A locking diopter, smooth center focus wheel, twist-up eyecups, and an included GlassPak chest harness round out this full-featured hunting binocular.
Check On AmazonIf you click this link and buy, we earn a commission at no additional cost to you.
The Astigmatism Rule: Why You Cannot Just Take Them Off
A frequent question from beginners is whether they can simply remove their glasses while birding once they understand the eye relief challenge. If you are only near-sighted or far-sighted, the answer is yes. The central focus wheel and the diopter adjustment can compensate for your vision perfectly. However, if you have astigmatism, taking your glasses off is not an option. Astigmatism is an irregular curve in your cornea, and no binocular focus wheel can correct for that.
If you have astigmatism, you must keep your glasses on to see a sharp, distortion-free bird. This completely changes the buying equation. Finding a model with long eye relief is no longer just a comfort preference. It becomes a strict mechanical requirement to participate in the hobby without constant eye strain.
Why Progressive Lenses Change the Math Completely
Standard eye relief recommendations apply fairly well to standard distance prescriptions. But progressive lenses introduce a completely different physical and optical challenge. Users with progressive lenses often need significantly longer eye relief, typically in the 17mm to 20mm range. This narrows the field of available options considerably. The issue stems from how progressives are physically constructed and how you have to hold your head to look through the correct optical zone.
With progressive lenses, you are often looking through the upper-middle portion of the glass for distance viewing. To align this specific zone with the optical center of the binocular, you naturally tilt your head slightly differently than someone with single-vision lenses. This tilt often increases the physical distance between your eye and the binocular eyepiece. Furthermore, progressive frames are often slightly deeper to accommodate the reading section at the bottom.
A user on the Paddling.com forums described this exact frustration: “I’ve just started wearing glasses for the first time (progressive lenses) and now my preferred binoculars have too short eye relief.” We regularly had to move customers in this exact scenario up to models offering 18.5mm to restore their full field of view.

Multilayer-coated lenses with silver-alloy prism coating deliver vivid, sharp images from dawn to dusk. O-ring sealed and nitrogen-purged, they stay clear through rain, snow, and humidity. The fiberglass-reinforced polycarbonate body with rubber armor keeps them lightweight yet durable, with turn-and-slide eyecups for comfortable all-day use with or without glasses.
Check On AmazonIf you click this link and buy, we earn a commission at no additional cost to you.
How to Tell if Your Eye Relief is Too Short
You need to know how to diagnose what you are seeing when you look through the barrels. When you have inadequate eye relief, you will see a clipped or vignetted view. The center of the image will be sharp, but the edges will have thick, dark corners that cut off your peripheral vision. It feels exactly like looking through a long tunnel.
As BirdWatching.com’s optics guide notes: “A binocular should let you see the whole image. Some binoculars make you lose the outer part of the image for a person wearing glasses.” That lost outer part is what drastically reduces your effective field of view, making it incredibly difficult to track a bird moving through dense foliage.
This vignetting is a distinct issue from the dark kidney bean effect or dark rings that appear when your eyes are too close to the ocular lens. If you are seeing floating black shadows that move as you shift your eyes, that means your eye is positioned past the optimal exit pupil point. For eyeglass wearers, this almost never happens unless you are using a model with massive eye relief and very thin frames.
Leaving the twist-up eyecups fully extended while wearing spectacles. This adds another 10mm of physical distance, guaranteeing you will not see the full field of view no matter how good the binoculars are.
Fully retracting or folding down the eyecups before bringing the binoculars to your face. Multi-click twist eyecups are ideal here because they allow you to find a middle ground if your frames sit very close to your eyes.
Do Not Sacrifice Close Focus for Comfort
Finding a long eye relief model is only half the battle for a serious birder. You still need an instrument that performs in the field. This means you cannot sacrifice close focus capabilities just to gain comfort. A good birding binocular must be able to focus clearly on a subject that is 10 feet away or closer. The best models reach down to 5 or 6 feet. Many optics designed for marine or hunting use offer massive eye relief but fail to focus on anything closer than 15 feet.
When you read a general binoculars buying guide, you will notice that terrain and target distance dictate the required specifications. If you are specifically looking at binoculars for bird watching, that under-8-foot close focus spec is non-negotiable for garden feeding stations or dense forest trails.
The Optical Trade-Off: Why Expensive Does Not Always Mean Better
When you start narrowing down your choices, you will likely notice a frustrating pattern. Some of the most expensive, highly-rated flagship models on the market have surprisingly short eye relief, often hovering between 13mm and 14mm. This is not a design flaw. Optical engineers face a strict physical trade-off: to achieve a massive, edge-to-edge field of view, they often have to sacrifice eye relief. These premium models are simply optimized for non-glasses wearers. As someone who wears spectacles, you have to accept a slightly narrower field of view to gain the 16mm or 17mm needed to see the image at all.
Weight also becomes a highly specific physical problem for spectacle wearers. A heavy 28-ounce binocular resting even lightly against your frames will push the nose pads down into your bridge over a long day. This causes localized fatigue and constant slipping. If you plan to bird all day, aiming for a mid-size model under 24 ounces will significantly reduce that pressure on your nose bridge.

Multi-coated lenses and BaK-4 prisms deliver sharp, color-accurate images across a wide 7 degree field of view, making it easy to track birds and wildlife in any lighting. The rubber-armored polycarbonate body is waterproof, nitrogen-purged, and tripod-adaptable for steady extended sessions. Backed by a Celestron Limited Lifetime Warranty and US-based support from a California optics brand with over 60 years of experience.
Check On AmazonIf you click this link and buy, we earn a commission at no additional cost to you.
Two Overlooked Mechanics: IPD and Harness Systems
Eye relief gets all the attention, but two other physical factors quietly ruin the birding experience for spectacle wearers. The first is Interpupillary Distance, commonly called IPD, which is the distance between the centers of your pupils. Spectacle frames, especially wide acetate models, can physically prevent the binocular barrels from folding close enough together. If your IPD is narrow (under 58mm), verify that the binocular’s minimum IPD closes far enough to match your own. Some models cannot hinge close enough to accommodate narrow IPD users, particularly when spectacle frames add physical bulk around the nose bridge.
The second factor is how you carry the optics. A standard neck strap concentrates the entire weight of the binocular into a pendulum that bounces against your chest. For a glasses wearer, pulling the optic up by a neck strap often drags the strap across the frames, altering your eye relief continuously. Switching to a chest harness secures the binocular tightly to your torso and allows for a clean, straight draw to your eyes without snagging your spectacles.
Key point: Always test the diopter adjustment mechanism. Some center-focus diopters become incredibly awkward to reach and lock when the eyecups are fully seated against the chassis.
Before you make a final decision, run through this quick mechanical checklist to ensure the model will actually perform in the field:
- Lock the eyecups in the fully retracted position and apply light pressure against your frames to ensure they do not collapse.
- Check the total weight to confirm it sits under the 24-ounce threshold to avoid slipping.
- Verify the center-focus diopter is still easily accessible when the eyecups are completely retracted.

Extra-Low Dispersion glass eliminates color fringing for razor-sharp, true-to-life images, while phase-coated BaK-4 prisms maximize light transmission even at dawn or dusk. The rubber-armored polycarbonate body is fully waterproof, nitrogen-purged, and features built-in tripod adapter threads for shake-free extended viewing. Backed by a Celestron Limited Lifetime Warranty and US-based support.
Check On AmazonIf you click this link and buy, we earn a commission at no additional cost to you.
Confirmed Long Eye Relief: Recommendations by Tier
Finding the intersection of long eye relief, fast focus, and close focus capability can be tedious. Based on the framework above, here are excellent options across different budget levels that successfully deliver 17mm or more of eye relief without sacrificing the features birders actually need.
If you wear thin wire frames and are looking for a reliable entry-level option that will not clip your view, this model delivers an impressive 17mm of eye relief while keeping the price tag manageable.
For the serious birder needing to focus on close garden feeders without taking off their glasses, this mid-tier option hits the sweet spot, combining 18mm of eye relief with a spectacular close focus capability.
If you wear progressive lenses and need maximum physical clearance paired with edge-to-edge optical clarity, this premium model is one of the few high-end binoculars that genuinely prioritizes spectacle wearers over raw field of view specs.

ED glass lenses with dielectric multilayer prism coatings virtually eliminate chromatic aberration and deliver bright, true-to-life color from dawn to dusk. A close focus distance of 8.2 feet and a broad field of view make tracking birds and wildlife effortless, while the smooth center focus knob allows precise adjustments on the move. Nitrogen-purged and O-ring sealed in a lightweight rubber-armored body, with turn-and-slide eyecups for all-day comfort.
Check On AmazonIf you click this link and buy, we earn a commission at no additional cost to you.
Final Thoughts: Test the Fit
The single best piece of advice I can offer is to test the optics while wearing the exact frames you plan to use in the field. Do not test them with your sunglasses if you primarily bird in your everyday prescription lenses. The difference in frame thickness will completely alter the optical experience. If you are shopping online, buy from a retailer with a generous return policy so you can perform this test in your living room.
Remember that finding the right pair is entirely about the physical mating of the instrument to your face. If you also need a lightweight option for hiking, the same rules apply to smaller models. You can learn more about finding that balance in my guide to compact binoculars for glasses wearers. Prioritize your comfort and your field of view, and the birding experience will naturally follow.
FAQs
🔭 What is the minimum eye relief for birding with glasses?
14mm is the technical floor to see the full image, but 15mm to 16mm is a much safer baseline for comfort. If you wear progressive lenses or thick plastic frames, you should aim for 17mm to 20mm to prevent the image edges from turning black.
👓 Can I just take my glasses off to use binoculars?
Yes, if you only have near-sightedness or far-sightedness, the binocular focus wheel will compensate for your vision. However, if you have astigmatism, you must keep your glasses on to see a sharp, distortion-free image. Most birders prefer keeping them on to easily spot birds naked-eye before raising the optics.
🦅 Do long eye relief binoculars have a narrower field of view?
Often, yes. Designing an eyepiece with very long eye relief typically forces optical engineers to reduce the overall field of view slightly. It is a strict physical trade-off, which is why finding a model that perfectly balances both specs is so important.
📏 What does it mean when the edges of the image are black?
This is called vignetting, and it means your spectacles are physically preventing your eyes from reaching close enough to the ocular lenses. Because you cannot reach the optimal exit pupil point, you lose a significant portion of the image.