Binoculars for Stargazing: The Rules Change at Night
The right equipment for observing birds in a forest and the right equipment for mapping constellations are fundamentally different instruments. They share the exact same basic technology, but they optimize for completely different environments. When you point glass at the night sky, you are no longer dealing with sunlight bouncing off a nearby object. You are trying to capture ancient, faint light from millions of light-years away, and that completely changes the math on what makes an optic effective.
At the optics counter, I would regularly talk to customers who assumed their expensive daytime hunting binoculars would automatically be incredible for looking at the cosmos. Most of the time, they came back disappointed. The most common mistake I see is people choosing magnification before thinking about how they will actually hold the instrument steady. If you want a reliable pair of binoculars for stargazing, you have to unlearn a few daytime habits and start prioritizing light gathering over almost everything else.
One distinct advantage of choosing binoculars over a cheap starter telescope is that you are viewing the sky with both eyes. Because you are using both eyes instead of one, your brain combines two separate images into a single brighter perception. This means a good pair of stargazing binoculars can actually appear up to 75 percent brighter than a telescope of the exact same aperture. This two-eye comfort is exactly why many experienced astronomers still keep a pair of binoculars ready for wide-field scanning.
Why Aperture Beats Magnification Every Time
In daytime use, I almost always steer people toward a 42mm objective lens because it perfectly balances light gathering and carrying weight. However, when you are looking into the dark, aperture is everything. The objective lens size determines exactly how much light the instrument can pull out of the night sky. A 50mm objective gathers significantly more light than a 42mm, and every additional millimeter reveals fainter objects that were previously invisible. This is exactly why standard daytime glass often struggles when pointed at the stars.
This sounds simple, but in practice, people fight against it because larger lenses mean heavier equipment. I have watched this confusion play out more times than I can count with eager beginners. Someone wants to see deep-sky objects, so they buy a compact 10×32 model because it is easy to pack for camping trips. They look up, see nothing but blackness, and falsely assume the binoculars are defective. The reality is that the 32mm lenses simply cannot collect enough ambient light to reveal faint targets like the Andromeda Galaxy.
Field Note: One of the most common things I heard at the counter was a customer wanting high magnification with small lenses, like a 12×32, specifically for astronomy. I always had to explain that higher magnification combined with small objective lenses results in a tiny exit pupil. For night viewing, a tiny exit pupil means a frustratingly dim image that makes stargazing almost impossible.
If you want to see beyond the moon and the brightest planets, 50mm is where serious stargazing begins. This size provides a large enough exit pupil to accommodate your dilated eyes in the dark. It also gathers enough light to make the Milky Way look like a glowing cloud of individual stars rather than a flat gray haze. When you prioritize objective size first, the rest of the specifications naturally fall into a more usable place.
Knowing what that 50mm objective lens unlocks is just as important as understanding its limitations before you head outside. That much aperture will reveal the Andromeda Galaxy as a faint smudge, bring out the rich detail of open star clusters, and reveal Jupiter’s four largest moons as tiny points of light. However, you need to set realistic expectations for planetary viewing. No amount of binocular aperture will show you Saturn’s rings or detailed planetary surface features, as those targets strictly require a telescope.

Multi-coated BK-7 prism glass delivers bright, sharp, high-contrast images at 10x magnification in a rubber-covered aluminum body with ergonomic thumb indents and finger ridges for a secure, comfortable grip. Water-resistant construction handles outdoor conditions reliably, and the package includes a carrying case, lens covers, and cleaning cloth. Backed by a Celestron Limited Lifetime Warranty and US-based support from a California optics brand with over 60 years of experience.
Check On AmazonIf you click this link and buy, we earn a commission at no additional cost to you.
Finding the Handheld Magnification Limit
People instinctively want maximum magnification when they start looking at the stars. When asked what binoculars for stargazing they should buy, most beginners assume a 15x or 20x model is the obvious choice. It does not work that way in the field. Unlike daytime viewing where stepping up the power is a simple tactical decision, astronomy pushes the extreme boundaries of human physical stability. The stars are pinpoint sources of light, which makes every tiny movement of your hands instantly visible.
For hand-held viewing, the practical working range is between 7x and 12x magnification. If you go above 12x without a mechanical support, the natural shake in your muscles turns stars into dancing streaks of light. This completely ruins your ability to resolve fine details on the lunar surface or separate close star pairings. The classic 10×50 configuration is almost universally recommended by experienced observers for exactly this reason. It provides enough magnification to make Jupiter’s moons visible while remaining stable enough for a comfortable backyard session.
If you prioritize a wider field of view over resolving detail, a 7×50 model is a fantastic alternative. The lower magnification makes it incredibly easy to hold steady, and the wider view helps beginners learn their way around the constellations. The massive 7.1mm exit pupil on a 7×50 also ensures you are getting the absolute brightest possible image in exceptionally dark sky locations.

Designed as an affordable entry into astronomy, these 7x50 binoculars feature large 50mm multi-coated objectives that gather ample light for bright, detailed views of comets, star clusters, and the Milky Way across a wide 6.6 degree field of view. Tripod-adaptable for steady extended sessions, they double as capable daytime binoculars with a 26.2 foot close focus. Backed by a Celestron Limited Lifetime Warranty and US-based support.
Check On AmazonIf you click this link and buy, we earn a commission at no additional cost to you.
The Hidden Advantage of Porro Prisms in Astronomy
I have spent plenty of time explaining why roof prisms dominate the modern daytime optics market. Their straight barrels are compact, highly durable, and relatively easy to waterproof for rugged outdoor use. But for astronomy, the older Porro prism design featuring offset barrels is almost always the better choice. Because they require less precise phase correction to achieve high light transmission, Porro prisms deliver incredible brightness for the price.
When you compare a budget roof prism against a budget Porro prism, the visual difference under the stars is stark. The Porro design naturally folds the light path in a way that minimizes light loss without requiring expensive mirror coatings. This means your money goes directly toward raw light gathering power rather than paying for a complex internal housing structure. For anyone putting together a stargazing binoculars guide on a tight budget, Porro models are the undisputed champions.
There is also a distinct depth of field advantage to the offset objective lenses of a Porro design. While everything in the night sky is essentially at optical infinity, the wider spacing of the front lenses provides a slightly more immersive, three-dimensional feel when scanning dense star fields. You get a richer observational experience without having to pay the premium prices demanded by high-end roof prism manufacturing.

Massive 70mm objective lenses paired with BaK-4 prisms maximize light throughput for bright, detailed views of the night sky at 15x magnification, making them a favorite for dawn, dusk, and astronomical observation. A built-in quarter-inch 20 tripod adapter attaches to most standard tripods in seconds, essential at this size and power. Water-resistant rubber armor provides durable protection in tough conditions, backed by a Celestron Limited Lifetime Warranty and US-based support.
Check On AmazonIf you click this link and buy, we earn a commission at no additional cost to you.
Why Many Astro Binoculars Use Individual Focus
As you shop for larger 15×70 or 20×80 astronomy binoculars, you will notice many models feature “individual focus” instead of the standard center focus wheel. For daytime use like birding or hunting, a fast center focus wheel is critical because subjects move rapidly between varying distances. In astronomy, everything you look at is essentially at optical infinity. This means you only need to focus your optics once at the beginning of your observation session.
An individual focus design requires you to adjust each eyepiece independently to match your specific vision. This mechanism is mechanically simpler, significantly more robust, and holds its focus setting indefinitely without slipping. Once you dial it in for your eyes, you never have to touch it again for the rest of the night. It allows you to simply relax and enjoy the view without worrying about accidentally bumping the focus wheel in the dark.
The Tripod Threshold for Heavy Glass
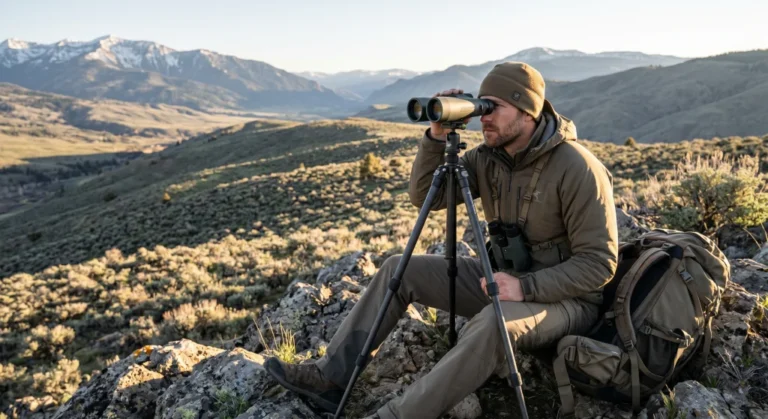
As you dive deeper into astronomy, you will eventually want more magnification to see tighter star clusters and lunar details. This introduces the tripod threshold, which is the physical limit where hand-holding becomes entirely impractical. A 10×50 model can be hand-held for short sessions, though even these benefit greatly from resting your elbows on a solid surface. Once you move up to a 15×70 configuration, a tripod shifts from being an optional accessory to a strict requirement.
Trying to use 15×70 binoculars without a mount is an exercise in pure frustration. The heavy objective lenses pull the instrument downward, straining your wrists and fatiguing your shoulders within just a few minutes. More importantly, you lose the ability to let your eyes relax and absorb the faint light of deep-sky objects. A sturdy tripod completely removes the physical effort, allowing you to focus entirely on the visual experience.
| Configuration | Handheld Viability | Primary Astronomy Use Case |
|---|---|---|
| 7×50 or 8×56 | Excellent for long viewing sessions | Milky Way sweeping, mapping wide constellations |
| 10×50 | Functional for short sessions | General astronomy, lunar viewing, bright clusters |
| 15×70 | Tripod heavily recommended | Orion Nebula, detailed lunar craters, double stars |
| 20×80 and up | Tripod strictly required | Faint deep sky objects, basic planetary observation |
If you decide to purchase a heavy binocular in the 15x or 20x range, you must budget for a quality tripod adapter and a fluid head mount. Standard photography ball heads are terrible for astronomy because they drop the heavy binoculars the moment you loosen the tension knob. A fluid pan head allows you to point the optics smoothly across the sky and lock them securely on a target without any sag.

This extra heavy-duty aluminum tripod supports giant binoculars, spotting scopes, cameras, and small telescopes, extending to a full 68 inches with tri-braced legs and lever-lock adjustments for quick, repeatable setup. A two-way fluid pan head with tension adjustment on both axes delivers smooth, controlled tracking motion. Includes a quarter-inch 20 quick-release shoe, bubble level, and cushion and spike feet for stable placement on any surface.
Check On AmazonIf you click this link and buy, we earn a commission at no additional cost to you.
The Reality of Astronomy Binocular Pricing
Astronomy is uniquely forgiving when it comes to binocular budgets, largely because the older Porro prism design remains so remarkably effective. If your budget is under $100, you need to temper your expectations significantly. The glass quality and mechanical alignment at this lowest tier often struggle to render stars as sharp pinpoints, leading to a frustrating first experience. You can find exceptions, but it is not the best place to start a serious search.
The $100 to $200 range is the absolute sweet spot for beginners. Here, you can easily find a solid, reliable 10×50 Porro binocular that provides excellent light transmission and sharp optics. Once you cross the $200 threshold, you are generally entering the territory of quality 15×70 or 20×80 instruments. At that level, you must also factor in the additional cost of a heavy-duty tripod and fluid head mount.
Preparing Your Eyes and Your Optics
Having the best binoculars for stargazing will not help you if your eyes are not prepared for the dark. The human pupil takes about 20 to 30 minutes to fully dilate in complete darkness, allowing your sensitive rod cells to take over. If you look at a phone screen or a bright porch light for even a single second, you instantly reset that 20-minute adjustment clock.
I always advise people to set up their gear before the sun completely disappears. You need to adjust the interpupillary distance and dial in the diopter setting while you still have some ambient light. There is much more to preparing your eyes for the night sky, including specialized techniques like averted vision, which helps you spot incredibly faint nebulae by looking slightly to the side of them. We cover those advanced techniques in complete depth in our guide on how to use binoculars for stargazing.

This powder-coated steel frame chair features a double-bungee support system with weather-resistant Textilene fabric and a padded headrest for a weightless, stress-free recline. The locking reclining mechanism transitions smoothly from upright to fully reclined with legs raised, supporting up to 300 lbs across a 26 by 43.3 inch footprint. Lightweight and folds flat for easy transport to the beach, campsite, or backyard.
Check On AmazonIf you click this link and buy, we earn a commission at no additional cost to you.
Final Thoughts: Keep the Setup Simple
Astronomy does not require complicated, expensive equipment to be incredibly rewarding. The most powerful tool you have is simply a dark sky and the patience to let your eyes fully adjust. By choosing a binocular with adequate aperture and manageable magnification, you completely bypass the steep learning curve of a telescope. You get to spend your first night actually looking at the universe instead of fighting with an equatorial mount and alignment software.
Start with the moon, map out the brightest constellations, and track down Jupiter to see its tiny moons sitting in a neat row. Take your time, lean back in a comfortable chair, and let the vastness of the sky wash over you. The right optics are just a window, but a good 10×50 setup is one of the widest and clearest windows you can own. For a broader overview of how to choose optics across all outdoor activities, check out our comprehensive binoculars buying guide, or read more on how to use binoculars for stargazing.
More Astronomy Binocular Guides
Finding the right optic is only the first part of the process. Once you have a firm handle on the basic specifications, the next step is setting your expectations for what the night sky actually looks like through glass, and deciding how to expand your setup over time. I have put together a few more detailed guides to help you navigate those next decisions and get the most out of every clear night.
| Stargazing Guide | What You Will Learn |
|---|---|
| Binoculars vs Telescope for Stargazing | The honest truth about which targets require a telescope and where binoculars actually provide a superior view. |
| Binoculars for Stargazing Beginners | A clear equipment progression path starting from basic 10×50 handhelds up to heavy mounted observational setups. |
| What Can You See With Binoculars | Managing your visual expectations before the first session so you know exactly what faint deep sky objects look like. |
FAQs
🔭 What magnification is best for astronomy binoculars?
For hand-held viewing, 10x is generally considered the maximum practical magnification before natural body tremors ruin the image. If you plan to use a tripod, 15x or 20x will provide spectacular views of the moon and larger star clusters. Beginners should almost always start with a 10×50 configuration to learn the sky comfortably.
🪐 Can I see Saturn’s rings with binoculars?
No, standard binoculars do not possess enough magnification to clearly resolve the rings of Saturn. Even with powerful 20×80 astronomy binoculars, Saturn will likely appear as an elongated oval rather than a distinct planet with separate rings. To actually see the ring structure, you need a telescope capable of pushing well beyond 50x magnification.
📸 Why do nebulae look gray instead of colorful like the photos?
The human eye is terrible at detecting color in low-light conditions because we rely on our rod cells in the dark. The brilliant pinks and reds you see in astrophotography are the result of cameras accumulating light over long exposures, often using special narrow-band filters. Through binoculars, even bright nebulae will appear as faint, ghostly gray or slightly greenish smudges.
🦵 How do I stop my arms from shaking while looking up?
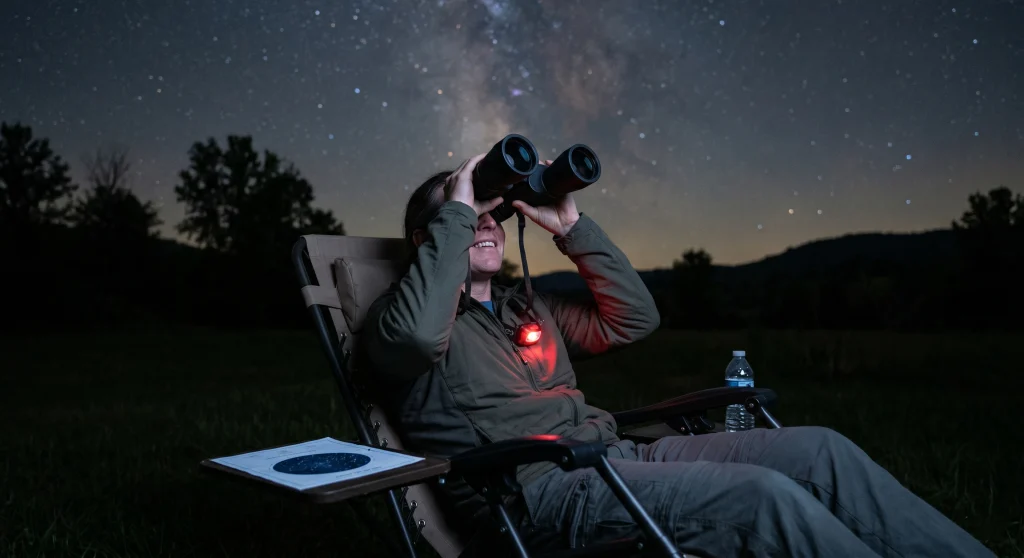
The most effective method for stabilizing hand-held binoculars is to sit in a reclining zero-gravity lawn chair. This supports your neck and allows you to rest your elbows solidly against the armrests or your own ribcage. By bracing your arms against your body, you eliminate the muscle fatigue that causes the handshake effect.
💸 Are expensive binoculars worth it for stargazing?
Up to a certain point, investing in better glass yields visibly brighter images and sharper stars across the edge of your field of view. However, astronomy is one of the few areas where budget-friendly Porro prism binoculars perform incredibly well. A solid $150 pair of 10×50 Porro binoculars will often provide a better night sky experience than a $500 pair of compact daytime roof prisms.