Binoculars for Stargazing Beginners: What to Buy, What to Expect, and Where to Start
Almost every experienced astronomer gives the exact same recommendation when it comes to binoculars for stargazing beginners: start with a 10×50 specification, and learn how to hold them steady or rest them on a lawn chair. I have watched people ignore this advice, buy massive 15×70 binoculars as their first binoculars for astronomy, and quickly get frustrated because the image shakes too much to see anything clearly.
There is a very good reason the 10×50 is the gold standard for your first night sky optic. It hits the perfect balance between light-gathering power and handheld stability. By keeping things simple, you spend more time actually looking at stars and less time fighting with heavy tripods or narrow fields of view. Here is why this setup works, what you should realistically expect to see, and where to go from there.
Why the 10×50 is the Standard Beginner Recommendation
In daytime optics, an 8×42 is the standard. But at night, the rules change entirely. The objective lens (the front glass) dictates how much light you gather, which directly determines how many stars you can pull out of the darkness.
A 50mm objective lens pulls in significantly more light than a 42mm lens. It gives you a 5.0mm exit pupil (50 divided by 10), which is wide enough to deliver a bright, clear image to your dilated eyes under suburban or dark skies. When you point a 50mm objective at the Milky Way, you suddenly see thousands of stars that were invisible to your naked eye.
The 10x magnification is the critical part of this equation. Ten power is generally the maximum magnification an average person can hold steady by hand. Anything higher, and the natural tremor in your arms turns stars into dancing streaks of light. The 10×50 hits the exact balance point: enough magnification to reveal Jupiter’s moons, enough aperture to find the Andromeda Galaxy, and just light enough (usually around 30 to 35 ounces) to use without a mount.
Field Note: At the optics counter, I would often have customers insist they wanted 12x or 15x for their first astronomy pair because they assumed more power was always better. I would hand them a 15x model and ask them to read a small sign across the store. Within ten seconds, the weight and the violent image shake would convince them to step down to the 10×50.

Multi-coated BK-7 prism glass delivers bright, sharp, high-contrast images at 10x magnification in a rubber-covered aluminum body with ergonomic thumb indents and finger ridges for a secure, comfortable grip. Water-resistant construction handles outdoor conditions reliably, and the package includes a carrying case, lens covers, and cleaning cloth. Backed by a Celestron Limited Lifetime Warranty and US-based support from a California optics brand with over 60 years of experience.
Check On AmazonIf you click this link and buy, we earn a commission at no additional cost to you.
The 7×50 Alternative: Less Power, More Stability
If you have shaky hands, or if you simply want a more relaxing view, the 7×50 is a fantastic alternative for beginner astronomy binoculars. This is the classic Navy specification, originally designed to be usable on the pitching deck of a ship at sea.
By dropping the magnification from 10x down to 7x, two things happen. First, the image becomes incredibly stable. You do not have to fight arm fatigue nearly as much, which allows for longer, more comfortable viewing sessions. Second, your field of view widens significantly.
A wider field of view makes it much easier to “star hop”—the process of navigating from a bright, known star to a fainter, hidden target. You get a larger slice of the sky in your view, making it harder to get lost. The tradeoff is that you lose a bit of the punch on smaller targets like planetary moons or tight star clusters, but many beginners find the forgiving nature of a 7×50 makes their first few nights under the stars much more enjoyable.

Designed as an affordable entry into astronomy, these 7x50 binoculars feature large 50mm multi-coated objectives that gather ample light for bright, detailed views of comets, star clusters, and the Milky Way across a wide 6.6 degree field of view. Tripod-adaptable for steady extended sessions, they double as capable daytime binoculars with a 26.2 foot close focus. Backed by a Celestron Limited Lifetime Warranty and US-based support.
Check On AmazonIf you click this link and buy, we earn a commission at no additional cost to you.
How to Hold Your Binoculars Steady
Even with a manageable 10x magnification, arm fatigue will eventually cause the image to shake. If you want to keep things simple and avoid a full tripod right away, you have two highly effective options that beginners often overlook.
The first is simply changing your posture. Resting your elbows on the armrests of a reclining lawn chair while looking up takes the weight off your shoulders and creates a remarkably stable view. The second option is a standard photography monopod. A monopod provides a physical resting point that absorbs most of the vertical shake, bridging the gap perfectly between handheld freedom and heavy tripod stability.

This lightweight 2 lb carbon fiber monopod extends from 24 to 66.92 inches via 4-section flip locks for fast, fumble-free setup, supporting up to 13.2 lbs of camera gear. The detachable tripod base offers three configurations including a fixed video monopod, portable monopod, or low-angle pod, with 360 degree swivel and 90 degree tilt in all directions. Compact enough for travel at just 24 inches folded, backed by a 6-year warranty.
Check On AmazonIf you click this link and buy, we earn a commission at no additional cost to you.
Setting Realistic Expectations: What You Will Actually See
This is where I see the most disappointment in new stargazers. People buy their beginner stargazing binoculars expecting to see the vibrant pinks and deep purples of the Orion Nebula, exactly as it looks in glossy magazines or online astrophotography.
Cameras can leave their shutters open for hours to gather light and saturated color. Your eyes work in real time, processing light in fractions of a second. You will not see bright colors in deep-sky objects. You will see shades of gray, and occasionally a faint greenish tint. However, what you can see is genuinely remarkable if your expectations are calibrated correctly.
- The Moon: This is spectacular in 10x50s. You will see crisp, three-dimensional details of craters and mountain ranges along the terminator (the line between light and shadow). A quick warning: the moon is incredibly bright through a 50mm objective. It will ruin your dark adaptation, so make it the last target of your night.
- Jupiter: It will appear as a distinct, bright disk rather than a flickering star. More importantly, you will clearly see up to four of its Galilean moons appearing as tiny pinpricks of light lined up next to the planet, changing position every night.
- Open Clusters: Targets like the Pleiades (the Seven Sisters) are actually better in binoculars than in a telescope. They resolve into dozens of brilliant, icy-blue stars against the black background.
- The Andromeda Galaxy: From a true dark sky, it will look like a faint, fuzzy smudge of light, slightly brighter in the center. From a suburban backyard with moderate light pollution, it may just look like a hazy star, or be completely washed out. It does not look like a defined spiral, but you are looking at light that has traveled 2.5 million years to reach your eyes.
Expecting to see the rings of Saturn clearly separated from the planet using handheld binoculars.
Understanding that Saturn will look slightly oval-shaped in 10x binoculars, and accepting that detailed ring structures require a telescope.
If you want a deeper dive into realistic targets and how to find them, I wrote a complete breakdown of what you can see with binoculars for stargazing to help you plan your first few sessions.
The Logical Progression Path for Beginners
The biggest mistake you can make is skipping the entry-level step. Buying massive, heavy equipment right away usually leads to that gear sitting in a closet because it is simply too cumbersome to drag outside on a Tuesday night.
There is a logical progression path that almost all successful amateur astronomers follow. It builds your skills naturally without requiring a massive upfront investment.
| Stage | Equipment | Primary Goal |
|---|---|---|
| Phase 1 | 10×50 Binoculars (Handheld or Monopod) | Learn constellations, star hop, identify major bright targets. |
| Phase 2 | 10×50 on a Tripod Adapter | Eliminate image shake to see fainter stars and clearer cluster details. |
| Phase 3 | 15×70 Binoculars OR a Telescope | Push deeper into space for faint nebulae or high-power planetary detail. |
Start with the 10×50 and learn the major constellations. Once you hit the limit of what you can see handheld, the cheapest and most effective upgrade is buying an inexpensive L-bracket adapter to mount your binoculars. You can put them on a monopod for quick sessions, or a standard camera tripod for longer ones. If you use a tripod, look for a pan-and-tilt head (or fluid head)—ball heads are notoriously frustrating to aim with binoculars. Mounting a 10×50 instantly makes fainter stars visible because your brain no longer has to process a vibrating image.
From there, you have a solid foundation to decide your next move. If you realize astronomy is your primary focus, exploring dedicated binoculars for stargazing will help you understand the jump to 15x or 20x magnification. On the other hand, if you want one optic to pull double duty for daytime use, our broader binoculars buying guide can help you balance those competing specs.

Massive 70mm objective lenses paired with BaK-4 prisms maximize light throughput for bright, detailed views of the night sky at 15x magnification, making them a favorite for dawn, dusk, and astronomical observation. A built-in quarter-inch 20 tripod adapter attaches to most standard tripods in seconds, essential at this size and power. Water-resistant rubber armor provides durable protection in tough conditions, backed by a Celestron Limited Lifetime Warranty and US-based support.
Check On AmazonIf you click this link and buy, we earn a commission at no additional cost to you.
A Quick Word on Dark Adaptation
Having the best binoculars for stargazing beginners will not help you if your eyes are not prepared to use them. Your pupils need time to physically dilate to take in the faint light of the night sky.
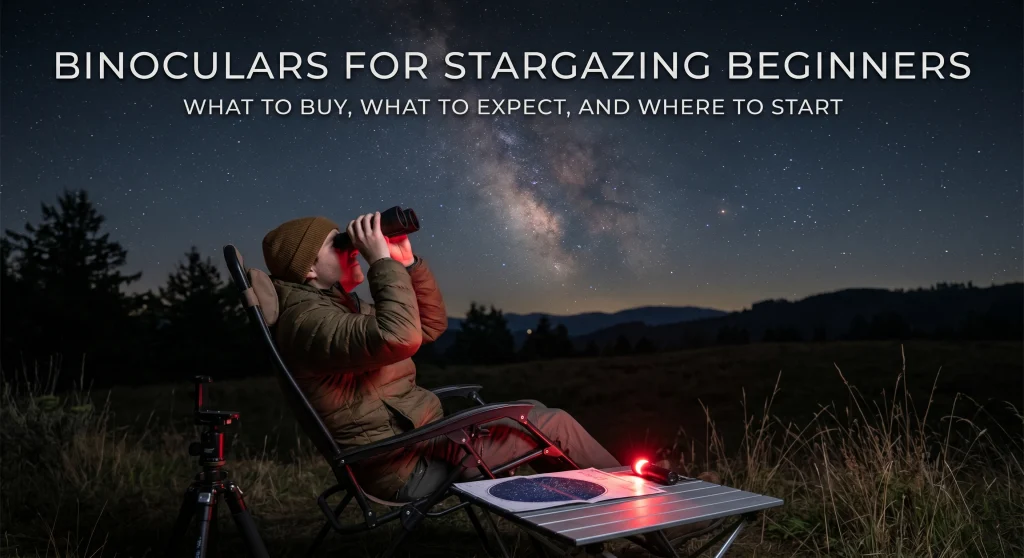
Set your binoculars up, adjust the eyecups for your face, and set your diopter focus wheel before you go into total darkness. Once you step outside, give your eyes at least 20 minutes to adapt to the dark. The most critical rule here: do not look at your smartphone. A single glance at a bright screen instantly resets your dark adaptation, and you have to wait another 20 minutes for your pupils to open up again.
If you need to look at a star chart or a planisphere, use a dim red flashlight. Red light preserves your night vision. For a deeper explanation of adjusting your focus in the dark and preparing your eyes properly, read our guide on how to use binoculars for stargazing.

This compact 9-bulb red LED flashlight offers two brightness settings, making it ideal for astronomy, star map reading, photography darkrooms, theatre use, and sea turtle safe lighting in coastal areas. A glow-in-the-dark grip ensures it is always easy to find in the dark, and the attached carabiner clip keeps it within reach wherever you go.
Check On AmazonIf you click this link and buy, we earn a commission at no additional cost to you.
Final Thoughts on Starting Your Astronomy Journey
Keeping things simple is the absolute key to enjoying your first few months looking at the night sky. The 10×50 specification remains the universal starting recommendation because it gives you enough aperture to pull deep-sky objects out of the darkness without immediately forcing you to buy and manage a heavy mount.
If you have reasonably steady hands and want the most detail possible for a beginner, a 10×50 is exactly where you should start. If you want a wider, more forgiving view and do not mind a slight drop in magnification, pick up a 7×50. Grab your preferred pair, set up a comfortable reclining chair, give your eyes time to adjust to the dark, and just start scanning the Milky Way. You will be amazed at how much is up there waiting to be seen.
FAQs
🌌 What is the best magnification for astronomy binoculars?
For handheld use, 7x to 10x is the best range because you can hold the image steady. If you plan to use a tripod exclusively, 15x to 20x provides excellent deep-sky views.
🔭 Are 10×42 binoculars good for stargazing?
They are acceptable if you already own a pair for birding or hunting, and they will show you the moon and bright clusters. However, a 10×50 is much better for astronomy because the larger 50mm lenses gather noticeably more light.
🪐 Can you see planets with 10×50 binoculars?
Yes, but as small disks rather than highly detailed globes. You can clearly see Jupiter’s four largest moons, and you can observe the changing crescent phases of Venus. You cannot see the rings of Saturn clearly without a telescope.
👓 Can I wear glasses while stargazing with binoculars?
Yes, but you need to check a specification called “eye relief.” Look for binoculars with at least 15mm (preferably 17mm or more) of eye relief so you can see the entire field of view while wearing your glasses.