The Most Expensive Mistake in Outdoor Optics
Choosing the right night vision binoculars comes down to understanding technology, not just reading a spec sheet or looking at maximum range claims. At the optics counter, I watched the exact same scenario play out every single week. Someone would walk in wanting to see wildlife in the dark, look at the staggering price differences in the display case, and make a decision based entirely on their budget.
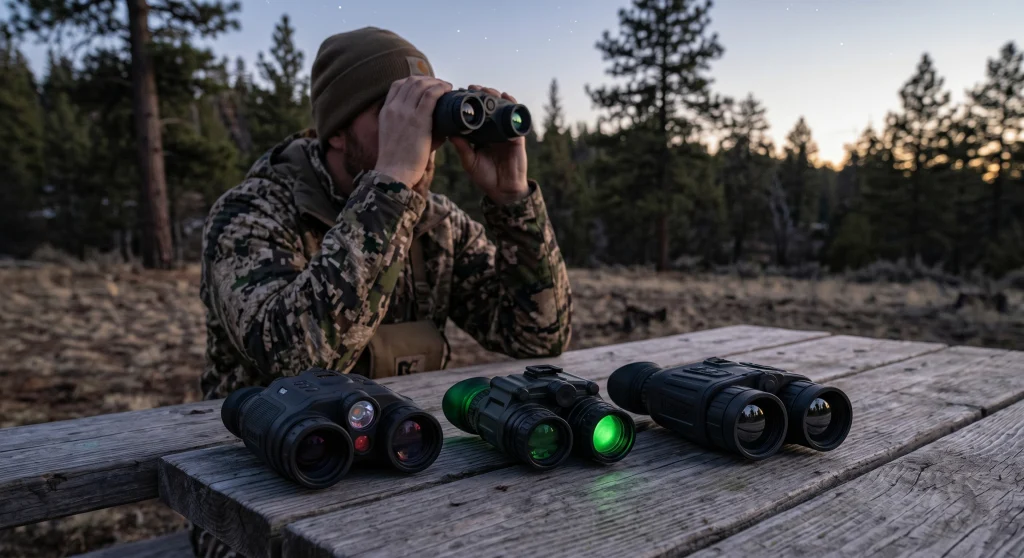
They assumed a $300 pair and a $2,000 pair did the exact same thing, just with different levels of optical clarity. That is not how night optics work. The massive price gap exists because you are looking at three distinct types of night vision binoculars. Each category uses a completely different method to render an image in the dark, and each has hard limitations based on ambient light and terrain.
If you buy a digital unit when you actually need thermal detection, your binoculars will be effectively useless for your specific task. If you buy a military-grade intensifier just to watch raccoons in your backyard, you have wasted a massive amount of money on capabilities you will never need. Getting this right requires matching the underlying technology to the environment you plan to use it in.
For a broader look at how night optics fit alongside standard daytime equipment, you can refer to my overarching guide on the types of binoculars. For now, let us break down the three technologies that allow you to see after the sun goes down, what you are actually paying for, and where each one falls short.
Digital Night Vision: The Camera Approach
If you are looking at night vision binoculars in the $100 to $500 range, you are almost certainly looking at a digital unit. These have become incredibly popular because they are affordable and packed with consumer-friendly features. But you need to understand exactly what you are trading away for that low price tag.
Digital units work exactly like a digital camera. They use a CMOS sensor to gather available light, process that light electronically, and display the resulting image on a small LCD screen inside the eyepiece. Because the image is processed digitally, these are the only night vision binoculars that allow you to easily record video and take photos to an SD card. For casual users who want to document what is visiting their property at night, this feature alone makes digital a highly practical choice.
The catch is how they handle total darkness. A digital sensor needs light to amplify. Under a bright full moon or near streetlights, it works well. But in a pitch-black forest, the internal screen will simply show static. To fix this limitation, manufacturers build an infrared (IR) illuminator directly into the binoculars.
Warning: The IR illuminator acts like a flashlight that is invisible to the naked human eye. It floods the area with infrared light so the digital sensor can see. However, this IR beam is brightly visible to any other night vision equipment, and the red glow of the bulb can sometimes be seen by animals if they look directly at you.
I always told customers that digital units are excellent for casual wildlife watching from a back porch or basic home security across an open lawn. They are affordable and fun to use. However, you are essentially looking at a tiny television screen, which means there is a slight electronic delay in the image. If you are scanning for fast movement, that fraction of a second lag can be frustrating. Furthermore, running a digital screen and an IR flashlight simultaneously drains standard batteries very quickly.

Powered by AI-ISP technology, these night vision goggles deliver full-color 4K ultra HD images with 99% color accuracy and 16x digital zoom reaching up to 3,280 feet in near-total darkness. Seven infrared modes, a built-in 6-axis gyroscope, and compass ensure stability and versatility across all conditions, while IPX5 waterproofing handles any weather. Two rechargeable batteries provide up to 8 hours of continuous use in a portable sub-500g body with tripod and helmet strap compatibility.
Check On AmazonIf you click this link and buy, we earn a commission at no additional cost to you.
Image Intensifiers: The Classic Green Glow
When most people picture night vision, they imagine a glowing green circle showing incredible detail. That specific look comes from image intensifier tubes. This is the traditional analog technology that has been used for decades by military and aviation professionals.
Instead of a digital camera sensor, these binoculars use a complex photocathode tube. The tube takes tiny amounts of ambient light from the stars or the moon, converts those light photons into electrons, multiplies them by the thousands, and throws them against a phosphor screen. That internal screen glows, creating the bright image you see through the eyepieces.
Because this is an analog process involving real photons traveling at the speed of light, there is zero delay. What you see is happening in absolute real time. This makes image intensifiers vastly superior for activities like nighttime boat navigation, where a digital screen lag could cause you to misjudge an approaching vessel.
The complication here is the generation tier, which dictates both performance and price.
- Generation 1 ($200 to $500): Works well in good moonlight but often has blurry, distorted edges known as a fish-eye effect. The tube lifespan is also shorter.
- Generation 2 ($500 to $1,500): This tier introduces a micro-channel plate that multiplies electrons far more efficiently. The image is significantly cleaner, the edges are sharper, and the binoculars can function in much lower light conditions without relying heavily on an IR illuminator.
- Generation 3 ($2,000+): This is military and law enforcement grade. It offers extreme low-light capability, exceptional clarity, and tubes built to last for thousands of hours.
Green Phosphor vs White Phosphor
If you shop in the Gen 2 or Gen 3 tiers, you will see a choice between green and white phosphor tubes. Green is the classic look. Our eyes are highly sensitive to green, which provides excellent perceived contrast for picking up fast movement in the dark. White phosphor produces a black-and-white image that feels much more natural. Many users find white phosphor significantly less fatiguing on the eyes during extended observation periods, though it often comes at a slight price premium.
Image intensifiers do suffer from light blooming. If you are looking at a dark field and a car drives by, the headlights will cause a massive halo effect that washes out the rest of the image. Older Gen 1 tubes can actually be permanently damaged by sudden exposure to bright light.
Key point: If you need to navigate a boat safely, identify a specific person, or read a license plate in the dark, an image intensifier is the right choice. They provide the highest level of facial and structural detail of any night optic, provided you have at least a fraction of ambient starlight.

This compact, waterproof night vision monocular features a built-in infrared illuminator and flood lens for clear low-light performance, with simple ergonomic controls designed for quick one-handed operation. Head and helmet mountable for fully hands-free use in the field. Note that export of this device outside the United States is restricted and controlled by the US Department of State.
Check On AmazonIf you click this link and buy, we earn a commission at no additional cost to you.
Thermal Optics: Detecting Heat Instead of Light
Thermal technology completely ignores light. It does not care if there is a full moon, heavy cloud cover, or if you are standing in a pitch-black cave. Instead of looking for photons, thermal sensors detect the microscopic differences in heat emitted by objects in the environment.
When you look through a thermal binocular, warmer objects glow brightly against cooler backgrounds. A living, breathing animal stands out like a neon sign against the cold ground or trees. This makes thermal binoculars for hunting an incredibly powerful tool, specifically for predator control or hog hunting in locations where it is legal.
The price barrier here is steep. Quality thermal units rarely start below $1,500, and premium models with high refresh rates easily exceed $5,000. You are paying for the ability to completely bypass the need for ambient light. You also bypass the need for an IR illuminator, making thermal completely passive and undetectable.
The major trade-off with thermal is the lack of specific detail. Because you are looking at a heat map rather than a light reflection, you cannot see fine features. A warm rock shaped like a sleeping animal will look exactly like a sleeping animal until it moves. You will know something alive is out there, but you will not be able to count the points on a deer’s antlers. Thermal provides ultimate detection, not identification.
Key point: If your absolute priority is finding hidden subjects, whether you are a hunter scanning for feral hogs in thick brush or conducting property surveillance across a dense tree line, thermal is the optic you need. It is built for uncompromising detection in any environment.

A highly sensitive thermal sensor with NETD under 25 mK delivers exceptional target detection out to 2,000 yards, with 4x continuous digital zoom and 2x to 4x stepped zoom for precise identification at any range. The dual eyepiece configuration reduces eye fatigue during extended observation, while picture-in-picture zoom and built-in recording add versatility in the field. The Stream Vision app connects wirelessly to your smart device for live streaming and remote control.
Check On AmazonIf you click this link and buy, we earn a commission at no additional cost to you.
How Weather Affects Each Technology
Most buyers test their optics on clear, dry nights. But weather changes how these different technologies perform, and failing to account for your local climate can lead to buyer’s remorse.
For digital and image intensifier binoculars, fog and heavy rain act like a wall. Because these devices rely on amplifying light, water droplets in the air scatter that light. If you turn on an IR illuminator in the fog, the infrared beam will reflect straight back into the lens, creating a blinding white wall on your screen. Rain also creates streaks and glare that severely limit how far you can see.
Thermal optics handle weather differently. Because thermal reads heat signatures, it can technically “see” through light fog and smoke better than standard night vision. However, heavy humidity and rain actively degrade a thermal image. Water absorbs infrared radiation. On a humid night following a rainstorm, the trees, ground, and rocks all equalize in temperature. The background washes out into a low-contrast grey mush.
Field Note: I once talked to a hunter who spent $4,000 on thermal binoculars for a trip to a swampy, high-humidity coastal area. He was frustrated because the image looked terrible compared to the crisp videos he saw online. The unit was not broken. The ambient moisture in the air was simply absorbing the heat signatures, significantly reducing his effective detection range. Thermal still works in the rain, but you lose the crisp contrast you get on a dry, cool night.
The Decisive Factor: The Vegetation Rule
If you are struggling to choose between these technologies, there is one practical field test that settles the debate immediately. I call it the vegetation rule. This is a quick baseline to help you visualize the difference in the field.
If an animal is standing behind a thicket of brush, digital and image intensifiers will just show you the illuminated brush. They rely on reflected light and cannot see through physical barriers. Thermal detects the heat bleeding through the gaps in the leaves, showing you a glowing silhouette.
If you need to find hidden subjects in dense terrain, thermal is the only viable option. For open fields, scanning the water, or watching a clear property line, traditional night vision works perfectly. We explore exactly how much terrain impacts this choice in our dedicated thermal versus night vision breakdown linked below.
Comparing the Three Technologies
To make the technical differences as practical as possible, I have mapped out how these three categories compare across the factors that actually impact field use. This is the exact breakdown I used to walk people through their options.
| Technology Type | Starting Price | Needs Ambient Light? | Sees Through Brush? | Best Practical Use |
|---|---|---|---|---|
| Digital CMOS | $100 to $500 | Yes (or relies on IR beam) | No | Backyard wildlife, casual security, recording video |
| Image Intensifier | $200 to $3,000+ | Yes (amplifies stars/moon) | No | Night navigation, identifying specific facial details |
| Thermal Sensor | $1,500+ | No (uses heat only) | Yes | Detecting hidden subjects, search and rescue |

This compact 4.32 by 2.58 by 0.98 inch power bank delivers 30W fast charging, boosting an iPhone 16 Pro Max to 50% in just 27 minutes and providing up to 2 full charges for an iPhone 15. The built-in 5.4 inch USB-C cable is tested to withstand over 10,000 bends, and 20W bi-directional input means the bank itself recharges quickly too. Compatible with iPhone 15 series, MacBook, Galaxy, iPad, Nintendo Switch, and more, backed by an 18-month warranty.
Check On AmazonIf you click this link and buy, we earn a commission at no additional cost to you.
Final Thoughts on Night Optics
Buying night vision is a serious investment, even at the entry level. The technology that matches your environment is the one worth investing in, and the specific guides below will help you confirm exactly which one that is before you spend your money.
Define exactly what you want to look at and where you will be standing. If you want to record the raccoons getting into your trash, a digital unit fits perfectly. If you want to navigate a boat safely in the dark without screen lag, an analog image intensifier is the correct tool. If you need to find feral hogs in a brush-choked field, save your budget until you can afford a thermal optic.
Specific Night Vision Breakdowns
If you have narrowed down your primary use case, these dedicated guides dig deeper into the specific capabilities, limitations, and legal considerations of each technology type in real-world scenarios.
| Detailed Guide | What It Covers |
|---|---|
| Digital Night Vision Binoculars | The truth about IR illuminators and what happens to your screen in total darkness. |
| Thermal vs Night Vision Binoculars | A direct comparison of how heat detection beats light amplification in dense terrain. |
| Night Vision Binoculars for Hunting | The legal restrictions you must check before taking any night optic into the field. |
| Are Night Vision Binoculars Good for Stargazing? | Why the IR flashlight effect actually ruins your view of the night sky. |
FAQs
🔋 Do digital night vision binoculars drain batteries quickly?
Yes, they are highly dependent on battery power. Powering the LCD screen, the digital processing sensor, and especially the heavy draw of the IR illuminator will drain standard batteries very fast. If you plan to be out all night, carrying multiple sets of spare batteries or using a rechargeable power bank is mandatory.
☀️ Can I use night vision binoculars during the day?
You can use digital and thermal binoculars during the day without damaging them. However, traditional analog image intensifiers (Gen 1, Gen 2, Gen 3) can suffer permanent tube damage if exposed to bright daylight. Always keep the protective caps firmly on analog tubes when the sun is up.
🪟 Can night vision binoculars see through glass?
Standard image intensifiers can see through glass as long as there is no glare. Digital night vision struggles through glass if the IR illuminator is turned on, because the infrared beam will reflect off the window back into the lens. Thermal optics absolutely cannot see through glass, as the glass blocks the heat signatures from reaching the sensor.
⏳ How long do image intensifier tubes last?
The lifespan depends heavily on the generation. Generation 1 tubes typically last around 1,000 to 2,000 hours of active use. Generation 2 tubes extend that to roughly 4,000 to 5,000 hours. Premium Generation 3 tubes can last 10,000 hours or more before showing significant degradation.