Are Night Vision Binoculars Good for Stargazing?
Night vision binoculars and regular optical binoculars work on completely opposite principles when you point them at the night sky. I talk to a lot of beginners who assume that because night vision amplifies light, it automatically makes everything in space look bigger and brighter. In practice, it doesn’t quite work that way, and understanding which tool you need depends entirely on what you are trying to see.
Standard binoculars gather available light through large glass objective lenses and magnify the image with high optical resolution. Night vision devices, on the other hand, take whatever faint ambient light is available, run it through an electronic sensor or an intensifier tube, and project a brighter image onto a screen. This light amplification is a massive advantage for certain celestial objects, but the electronic processing introduces a resolution limit that hinders others.
If you choose to use night vision binoculars for stargazing, you have to accept that you are trading crisp, high-definition optical clarity for sheer light-gathering volume. For a casual observer in a dark backyard, this trade-off can actually be a lot of fun, provided you know exactly where to point them and what to expect when you look through the eyepieces.
What Night Vision Actually Shows You in the Night Sky
There are specific scenarios in amateur astronomy where night vision equipment genuinely shines. Because the technology is designed to amplify dim light across a wide field of view, it excels at picking up movement and broad structures that your naked eye struggles to resolve against a dark background.
The most immediate advantage is satellite tracking. The International Space Station and countless smaller satellites reflect sunlight as they orbit, appearing as barely visible, moving dots. Through night vision, these dots become glaringly obvious streaks of light moving across the screen. Similarly, if you are out during a meteor shower, the amplification makes faint, fleeting meteors much easier to spot before they burn out.
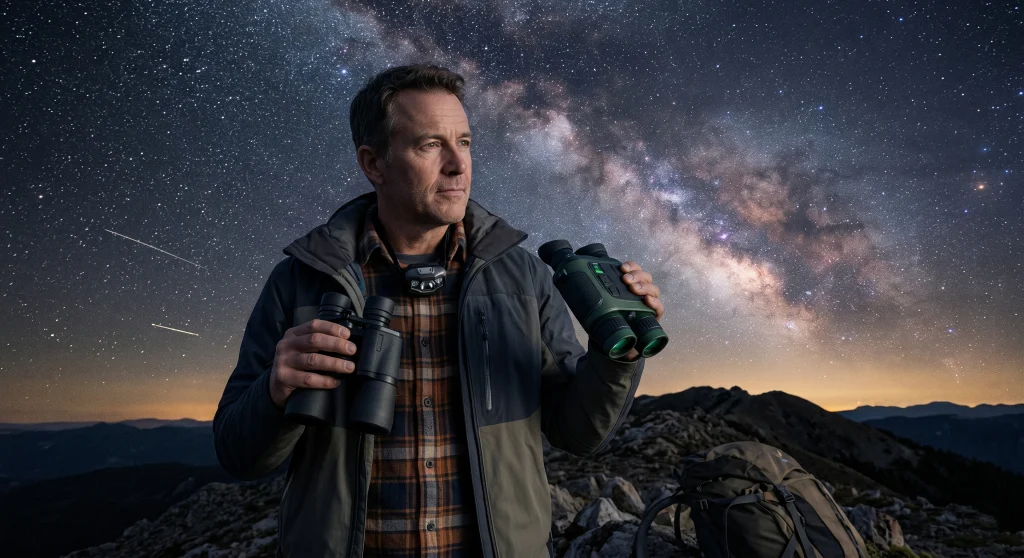
The other major strength is viewing the Milky Way and dense star fields. When you look at the Milky Way with standard optics, you see a localized cluster of stars. When you use night vision binoculars, the experience of astronomy takes on a different feel. The sheer volume of background stars is amplified, turning the hazy band of our galaxy into a dense, glowing cloud of distinct points of light.
Field Note: One of the most common reactions I see when people look at the sky through night vision for the first time is surprise at how crowded space looks. A patch of sky that looks completely empty to the naked eye suddenly reveals dozens of dim background stars. It is excellent for grasping the scale of the sky, even if it lacks the sharp detail of a traditional glass lens.

Powered by AI-ISP technology, these night vision goggles deliver full-color 4K ultra HD images with 99% color accuracy and 16x digital zoom reaching up to 3,280 feet in near-total darkness. Seven infrared modes, a built-in 6-axis gyroscope, and compass ensure stability and versatility across all conditions, while IPX5 waterproofing handles any weather. Two rechargeable batteries provide up to 8 hours of continuous use in a portable sub-500g body with tripod and helmet strap compatibility.
Check On AmazonIf you click this link and buy, we earn a commission at no additional cost to you.
Where Standard Optics Beat Night Vision for Astronomy
While the light amplification is impressive, night vision falls flat when you need optical resolution. The moon is usually the first celestial object beginners point their optics at, and it perfectly illustrates this limitation. Because the lunar surface reflects so much sunlight, a night vision sensor becomes completely oversaturated by the brightness. Instead of seeing crisp craters and natural shadows like you would through standard glass, you just see a blinding white circle.
Planets like Jupiter and Saturn suffer from the same problem. Through a digital night vision sensor, Jupiter simply looks like an overly bright blob of light. The sensor amplifies the glare to the point where any subtle details are completely washed out. Standard 10×50 binoculars, relying purely on high-quality optical glass, will easily show you Jupiter as a distinct disc and reveal its four largest Galilean moons without the glare.
Deep-sky objects like distant galaxies present a completely different problem. While planets fail because they are too bright, galaxies fail because they require high optical contrast to see their structure. Night vision is genuinely useful for initially locating dim nebulae or the glowing core of the Andromeda Galaxy against a dark sky. However, while it helps you find these targets, the digital display lacks the sharpness needed to appreciate them. For observing those details, allowing your eyes to naturally dark-adapt and using traditional glass remains the superior method. You can learn more about the proper technique for this in our guide on how to use binoculars for stargazing.

Aspherical multicoated eco-glass lenses deliver bright, clear images across a wide range of lighting conditions in a lightweight, ergonomically designed body. Rubber armor ensures a secure non-slip grip even in wet conditions, while turn-and-slide eyecups and a smooth central focus knob make extended viewing comfortable and effortless with or without glasses.
Check On AmazonIf you click this link and buy, we earn a commission at no additional cost to you.
Digital vs. Image Intensifier for the Night Sky
Most consumer night vision equipment sold today is digital, but for stargazing, the underlying technology makes a noticeable difference. Digital night vision relies on an electronic sensor. When you push the internal gain to its maximum to see faint stars, the screen often fills with electronic noise or static, which distracts from the view.
If you are serious about passive light amplification for astronomy, traditional image intensifier tubes, specifically Generation 2 and Generation 3 models, perform much better. These tubes amplify real photons directly. This gives you a much cleaner, static-free view of the night sky compared to a digital sensor, making them the preferred choice for serious amateur astronomers who use night vision. However, this performance comes with a steep price tag. Quality Gen 2 or Gen 3 tubes typically start well over $1,500, making digital the only practical entry point for most casual users.

Large 50mm objectives and 10x magnification combine with multi-coated optics and BAK-4 porro prisms to deliver bright, clear views across a wide 5.8 degree field of view, day or night. Waterproof and nitrogen-purged for worry-free use in almost any weather, with a generous 20mm eye relief for comfortable extended viewing with or without glasses.
Check On AmazonIf you click this link and buy, we earn a commission at no additional cost to you.
The IR Illuminator Problem for Stargazing
If there is one massive trap beginners fall into when taking night vision outside, it involves the built-in infrared (IR) illuminator. Most consumer digital night vision relies on this IR flashlight to see in total darkness on land. However, when you point that device at the sky, the IR illuminator becomes your worst enemy.
Stars are light-years away, meaning your IR beam will never reach them to illuminate anything. What the IR beam does illuminate, however, is every single particle of dust in the air, the humidity, and the tops of nearby trees. This floods your sensor with local glare, completely washing out the dim starlight you are actually trying to see.
Worse still, turning on an IR illuminator near other people who are trying to stargaze will instantly ruin the night sky view for anyone else using NV equipment nearby. To get any value out of night vision for astronomy, you have to follow a strict setup process to ensure you are only relying on passive light amplification.
Key point: If you are using night vision for the sky, you must force the device into passive mode by physically turning the IR illuminator off. If your model automatically activates the IR in dark conditions and cannot be overridden, it is virtually useless for astronomy.
To set up your night vision properly for the night sky, you need to configure the device before you ever look up:
- Disable the IR illuminator completely in the device settings.
- Turn the screen brightness down to its lowest possible setting to preserve your own natural dark adaptation.
- Set the gain or sensor sensitivity to medium; turning it to maximum will introduce too much digital “noise” or static into the image.
- Focus the device manually on the brightest star you can find before trying to scan for dimmer objects.

This simple adapter mounts any porro or roof prism binoculars to a standard tripod for vibration-free, hands-free viewing with added stability. A straightforward upgrade for extended observation sessions where a steady image matters.
Check On AmazonIf you click this link and buy, we earn a commission at no additional cost to you.
Night Vision vs. Regular Binoculars for the Night Sky
Choosing between these two technologies comes down to a realistic assessment of your goals. Over time, I have watched this play out at the counter enough to know that buyers who want to study the craters on the moon are unhappy with night vision, while buyers who want to hunt for moving satellites are thrilled with it.
Standard binoculars are the traditional entry point into astronomy for a reason. They offer natural color, pinpoint optical sharpness, and require zero batteries. They train your eyes to navigate the sky properly. Night vision is an incredible supplementary tool, but it behaves more like a low-resolution television screen displaying the sky, rather than a clear window into space.
To make the practical differences clearer, it helps to map exactly how each tool handles the most common celestial targets side-by-side.
| Celestial Target | Standard 10×50 Binoculars | Night Vision Binoculars |
|---|---|---|
| The moon | Excellent. Crisp craters and natural shadows. | Poor. The reflected sunlight overwhelms the digital sensor. |
| Planets (Jupiter/Saturn) | Good. Shows planetary discs and Jupiter’s moons. | Poor. Resolves as a washed-out glare with no visible detail. |
| Satellites & ISS | Fair. Visible, but can be hard to track across the sky. | Exceptional. Highly visible moving streaks of light. |
| The Milky Way | Good. Shows faint cloudy structures with dark adaptation. | Excellent. Amplifies background stars into a dense field. |
| Meteors | Poor. Field of view is usually too narrow to catch them. | Good. Wide field and light amplification make them pop. |

Massive 70mm objective lenses paired with BaK-4 prisms maximize light throughput for bright, detailed views of the night sky at 15x magnification, making them a favorite for dawn, dusk, and astronomical observation. A built-in quarter-inch 20 tripod adapter attaches to most standard tripods in seconds, essential at this size and power. Water-resistant rubber armor provides durable protection in tough conditions, backed by a Celestron Limited Lifetime Warranty and US-based support.
Check On AmazonIf you click this link and buy, we earn a commission at no additional cost to you.
Final: The Combined Approach to the Night Sky
In my experience, the most successful way to use night vision for astronomy isn’t to treat it as a replacement for traditional glass, but as a scouting tool. Many experienced sky watchers keep a digital device handy to scan the broad sky, locate the exact position of hard-to-spot satellite trains, or catch the first meteors of a shower.
Once they locate an area of interest, they put the digital screen down and switch to a high-quality optical instrument to actually study it. If you want to dive deeper into the specific types of traditional glass that work best for this, I recommend reading our comprehensive buying guide for stargazing binoculars to see what optical specs matter most.
If you read this and realize that tracking satellites, hunting for meteors, or scanning the Milky Way is exactly what you want to do, a dedicated night vision device is a fantastic investment. To figure out which specific technology fits your budget, head over to our main night vision binoculars guide. You can also review our main overview on the different types of binoculars to see how they stack up against other specialized categories.
FAQs
🔭 Can you use night vision binoculars for stargazing?
Yes, you can use them, but they are best suited for specific targets like tracking moving satellites, watching meteor showers, or viewing the broad structure of the Milky Way. They are not effective for viewing details on planets or the moon.
🌌 Does digital night vision work for seeing distant galaxies?
It helps for locating them, but not for viewing details. While light amplification can make a dim nebula or galaxy slightly more visible as a smudge, the digital sensor lacks the optical contrast and resolution needed to actually see any meaningful structure.
💡 Should I turn on the IR light when looking at stars?
No. You must turn the IR illuminator off for astronomy. The infrared beam cannot reach space; it will only light up atmospheric dust and nearby trees, creating glare that ruins your view of the night sky.
🪐 Will night vision let me see the rings of Saturn?
No. Saturn is already very bright, and a night vision sensor will over-amplify that light, creating a harsh glare that hides all details. To see Saturn’s rings, you need standard optical binoculars with at least 10x to 12x magnification and excellent glass clarity.